In-between seasons in rainy Oregon, what better time to sharpen another damned crosscut? Oh, summer is coming, some day...
(Please see my original crosscut sharpening write-up on Green Cascadia. It has a more detailed description of the process.)
I received this new 4' beast from my good buddy Kirk. Kirk...finds many things, under couch cushions, deadbeats, from thin air. He is always looking out for somebody else and passes on many gifts. Well he knew I love the old crosscuts, and brought me this one from a garage sale. I have no idea of it's history. As you can see, it's a dual-handled one-man crosscut.
ready to get to work
D-handle removed. Nice shiny steel underneath! And rust elsewhere, go figure. The upper handle was riveted in place.
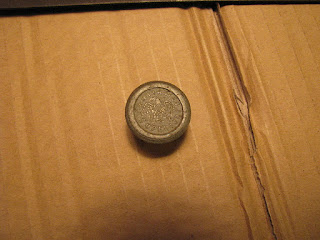
"Warranted Superior" says the tag.
From The Disstonian Institute:
Warran and Ted Superior were not brothers in the saw manufacturing business.
Warranted Superior medallions are found on secondary lines manufactured by Disston and other major saw makers with other brand names on the etch. Some smaller 19th century saw makers may have bought sawnuts and medallions from the bigger factories.
After 1900 or so the "small guys" were actually secondary lines of the "big guys." The small companies were bought up by bigger ones and some of their products were continued for a time. Harvey Peace is one example. Most American saws from the 20th century, regardless of brand name, were made in the works of Disston, Atkins, Bishop, or Simonds.
In the case of Disston, their replacement medallions were stamped Warranted Superior rather than "Disston." I would speculate their rationale was they didn't want their name on lesser-quality saws. Brand identity and loyalty in the U.S. was much stronger in the first half of the 20th century than it is today.
Well then, there you have it.
It's a nice vintage saw, I'd say from the 1940s-50s. True to form, it doesn't have the same quality and heft as some of the larger and better made saws of the era. But compared to modern products, it appears top of the line. Funny how historic perspective distorts. Junk, we live in an era of junk. The only way to get real quality is to find the old antiquated "junk" from another era.
I quickly get to work with 400 grit sandpaper and gobs of WD40.
side 1 in the works
No more rust! The trick is to sand along the length of the saw, avoiding creating any high or low spots. You also don't want to remove the old grinding marks from when the saw was manufactured unless the rust is really deep. If the rust has pitted the saw deeply, then it's not worth the effort. I wonder how many good saws are out there with mountain scenes painted upon their flanks? Oh the travesty.
side 1 done
ugh, side 2 more rust
but like time it seems to melt away
As rusty as the saw was, there wasn't any pitting. In fact, it looks like it hasn't received much use. It only took me a couple hours to remove the rust and move on to sharpening and setting.
In the vice. I don't have a saw vice yet, so I just secure it to the workbench. The arrangement works well.
This photo shows the saw just after jointing, or filing the cutting teeth tips to match the arc of the saw.
Raker tips have been filed and are ready for swaging.
This saw is made of much thinner stock than the larger 2-man crosscuts, making filing and swaging a more delicate operation. I did mash a couple raker tips in the beginning until I got the feeling of the thinner metal. The rakers looked like they had never been filed or shaped! It took a lot of work to get their contours right. Setting the cutting teeth was also a delicate operation. However, it was nice to notice that many of them had retained their set from a sharpening of 50+ years ago, very cool. I also noticed that due to the thinness of the saw, I had to go back and check the set a few times and make minor adjustments.
ghost etch: "cast steel, economy"
And then just like that, the saw is like new and ready for her next 50 years. Afterwards, be sure to coat the saw with oil or it will rust.
from beast to beauty
During our Solstice camp, I warmed the old gal up on a downed cedar. Due to it's lighter construction, it doesn't bite into the wood as hungrily as the larger saws, but it is much more portable and cuts far superior to a shorter "hardware store" saw. It will be very useful to hike with. All told it took me about 5 hours of constant work. Of course, well worth the effort! It always makes me smile to hear them sing again.


I'd like to get a close up of the D saw handle so that I may duplicate it.
ReplyDeleteThis comment has been removed by the author.
ReplyDeleteNice job on the saw! I am attempting the same as you did on the same type of saw (plus making a replacement handle).
ReplyDelete